How To Dehydrate Food?
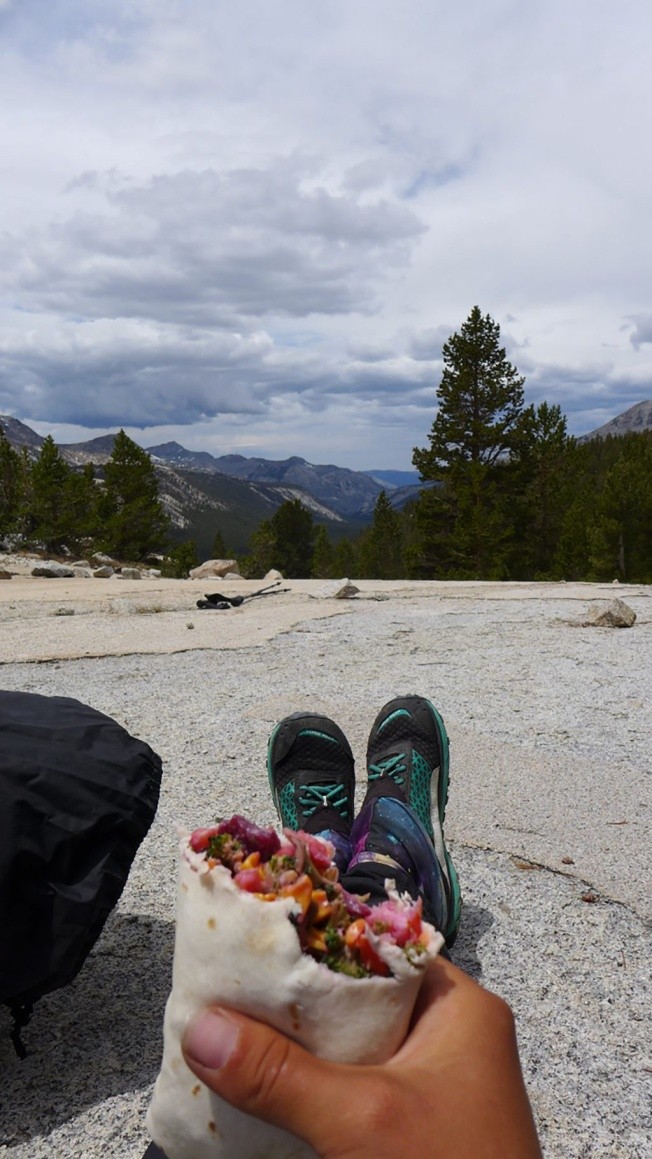
Everything you need to know to whip up the dehydrated feast of your backcountry dreams As anyone who has been on an overnight backpacking, paddling or cycling trip can tell you, your thoughts eventually turn to food. You start dreaming of the burger or ice cream (or, let’s be honest, both) you’ll have post-trip. But there’s no reason to save the good food for the end. Dehydrating your own food is easy and rewarding. The drying process slowly removes moisture while retaining nutrients and flavor. Not only can you control what you’re putting into your body, it tastes way better than pre-packaged food. It’s cheaper and often lighter too, which is important when you’re trying to conserve space and cut down on weight.
Most dehydrated food recipes require that you own your own dehydrator, though there are some items you can prep using an oven on a low setting, like fruit leather. A mandoline slicer (used with caution) and a pressure cooker will also speed the process up, but aren’t necessary to make delicious dehydrated food. If you don’t have a mandoline slicer, good knife skills are important.
 How to Choose a Food Dehydrator
A dehydrator will run you anywhere from $30 to several hundred dollars, depending on the amount of tray space and features you want. The two key features to look for are a fan for even heat distribution and multiple temperature settings to properly dry different types of food. It is possible to over-dehydrate if you dry food on too high a temperature or for too long.
If you’re trying to make a lot of food, more surface area is worth investing in due to the amount of time dehydrating takes (anywhere from 5 to 14 hours). Square trays hold more than round ones with cutouts in the middle. A timer lets you leave the house without worrying about overdrying, but it isn’t an essential feature. If you’re not sure what you need, start with a cheaper model and work your way up from there. Sometimes, you can even find dehydrators at thrift stores.
Nonstick sheets or parchment paper are required for drying sauces, soups and fruit leather. Some dehydrator brands sell specific sheets that fit their trays.
What Foods Can You Dehydrate?

Most food can be dehydrated at home, with the general exclusion of dairy products and highly fatty items. Unlike fruit, meat and most veggies should be cooked before drying. Once you have a variety of dried ingredients, you can assemble them into meals. Some whole meals can be prepared and then dehydrated, like soup and risotto. This minimizes prep even further and allows flavors to meld, making for delicious and easy on-trail dinners.
- You can dehydrate a variety of foods at the same time, so long as they require the same drying temperature.
Food Prep: The Key to Dehydrating
 Food shrinks significantly as it loses moisture, so keep that in mind when considering how much you want to make. For example, a pound of apples (before slicing) yields about a cup of dehydrated apple slices. While you want to thinly slice foods to promote even drying, don’t make pieces too small or they’ll get lost in the meal when you rehydrate.
Storing Dehydrated Food
 Properly stored, dried fruit can last up to five years, and veggies up to 10. The key is preventing oxidation. If you’re going to consume non-meat items within a year, you can keep them in freezer bags with the air squeezed out. For long-term preservation, vacuum-sealing with an oxygen absorber is best. Store in a cool, dark place.
Meat and seafood can be stored in freezer bags and kept in a cool, dark place if being consumed within a month, otherwise vacuum-sealing and freezing is best. Meat can be stored for up a year properly stored in the freezer. Use common sense—don’t consume food that looks or smells rancid.
How to Dehydrate Fruit
 Fruit can be dried a couple different ways: sliced or blended. Sliced fruit makes a great trail snack on its own, or it can be mixed into oatmeal or granola for breakfast. Blended, it dries into fruit leather that you can snack on or rehydrate into pudding—particularly if the blend includes bananas, which lend a creamy consistency.
- Fruit, whether sliced or blended, should be dried at 135°F until leathery and pliable.
Recipe: Cinnamon Apples
 Quarter and core 4 small-to-medium apples (peeling is optional). Using a knife or mandoline, cut into 1/8-in. slices. Halve large pieces.
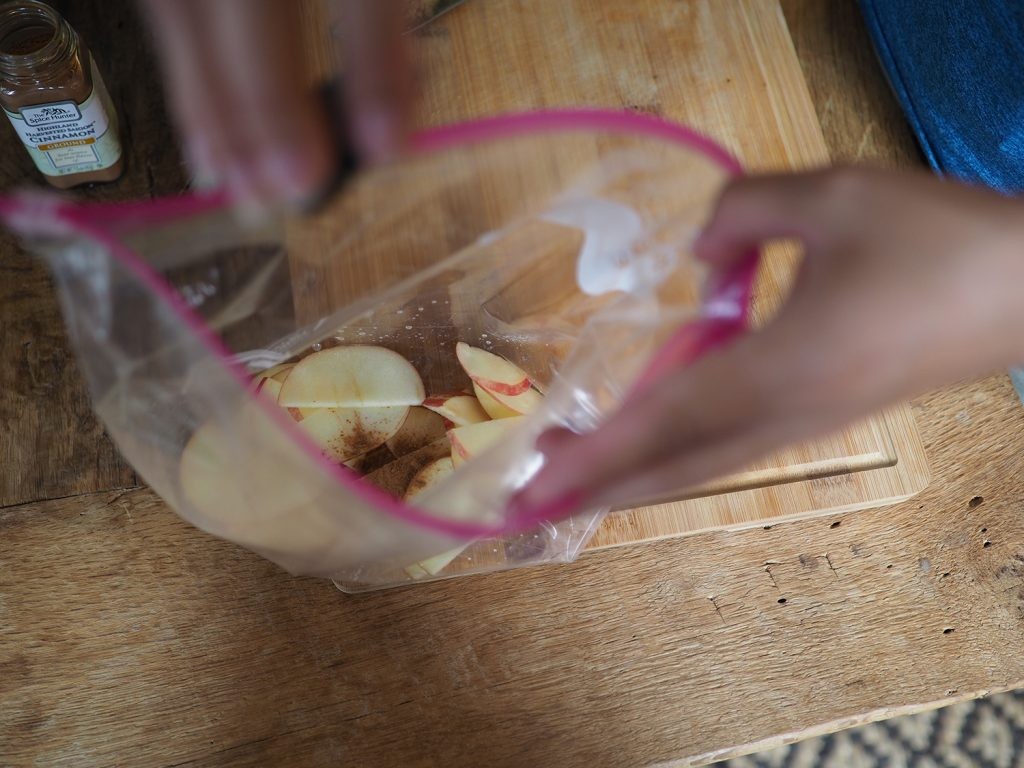
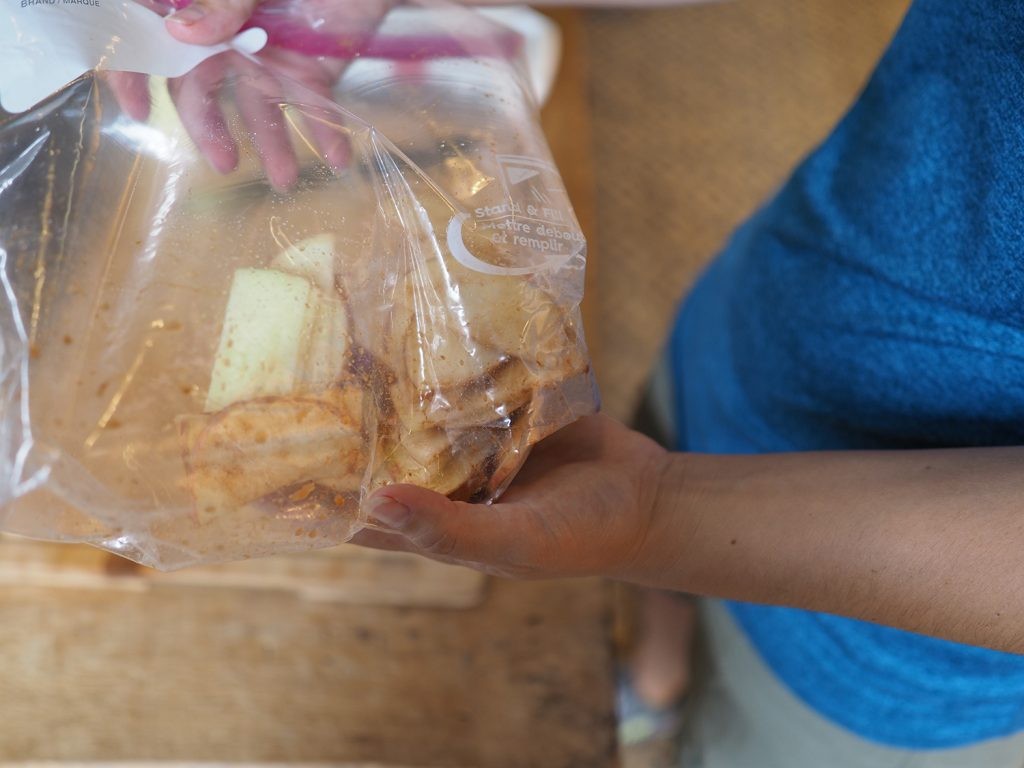 Place the apples in a bowl or plastic bag and add 1 tsp. of lemon juice and 1–2 tsp. of cinnamon, depending on your taste. If your apples are tart, add 1 tsp. of sugar (optional).
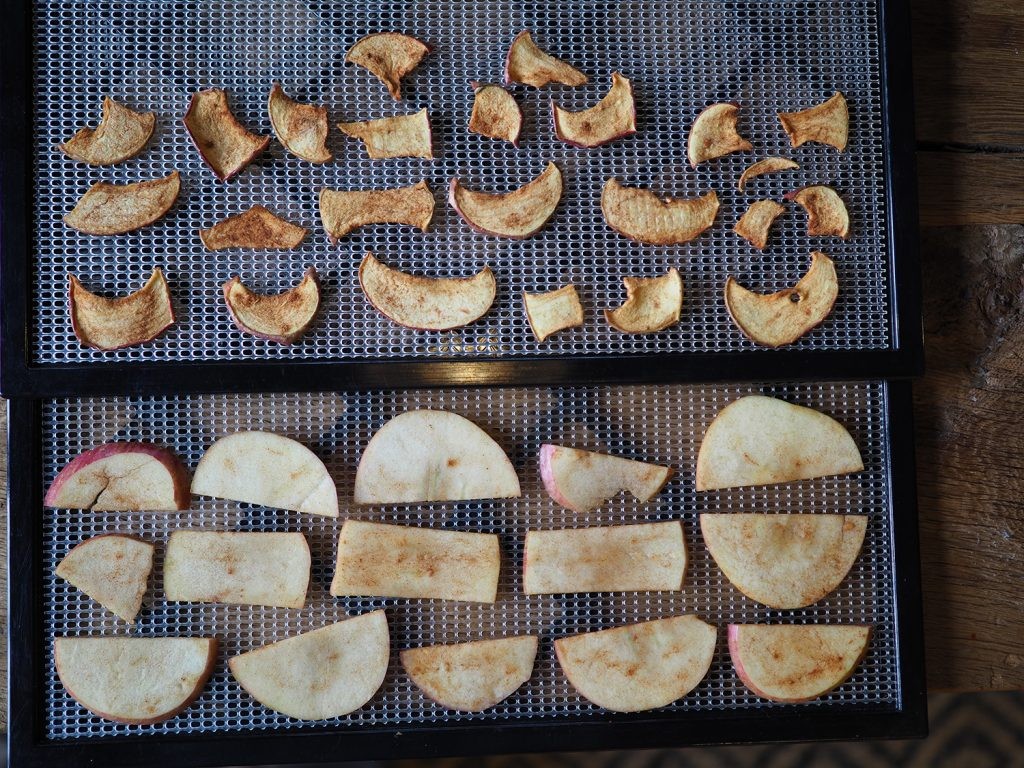 Stir well or shake bag to coat the apple slices. Place on dehydrator trays and dry at 135°F for 8–12 hours until leathery and pliable.
How to Dehydrate Vegetables
 The general rule of thumb for dehydrating vegetables is that if you can eat them raw normally, you don’t need to cook them before drying. Depending on your rehydrating method, however, you might want to cook all your veggies. If you plan to simply add boiling water to the food instead of boiling your meal for at least a minute, steaming veggies before drying makes them rehydrate better (see “How to Rehydrate Dried Food” below for more details).
Want to save time? Frozen veggies are an easy option and don’t need to be thawed before going in your dehydrator, though corn is better if it has been steamed. Canned vegetables are generally too saturated to dry well, with the exception of beets.
Pro tip: Don’t dehydrate onions–they make your whole house smell. Dried onions are cheap to buy in the spice section of your local grocery store.
- Most veggies can be dried at 125°F until dry. Some with higher moisture content, like zucchini and cucumber, can be dried at 135°F.
Example Times and Yields
- Frozen mixed vegetables: Dry at 125°F for 6–8 hours; 1 lb. yields about 3/4 cup dry.
- Mushrooms: Slice 1/8-in. thick and dry at 125°F for 6-8 hours; 1 lb. yields about 1–1 1/2 cup dry.
How to Dehydrate Meat and Seafood
 Meat and seafood are a little trickier than fruits and veggies, as they need to be heated the right amount to kill bacteria and occasionally need some help to rehydrate properly. You should only use lean meats, as fats and oils can go rancid and ruin your food. All types of meat should be dried at 145°F until hard and dry.
Meat and seafood to try:
- Ground beef
- Deli meats like lean ham, turkey and roast beef
- Canned or pressure-cooked chicken
- Canned tuna
- Cooked shrimp
- Imitation crab
Recipe: Ground Beef
Choose lean or extra-lean meat only, as extra fat can lead to spoilage. Ground beef doesn’t rehydrate well on its own; however, adding bread crumbs allows it to absorb enough moisture and provides seasoning. Add 1/2 cup bread crumbs for every 1 lb. of meat. This will yield 2 cups of dry ground beef.

Put raw ground beef in a bowl and add bread crumbs. Add salt and pepper to taste. Mix with your hands until the crumbs are evenly distributed.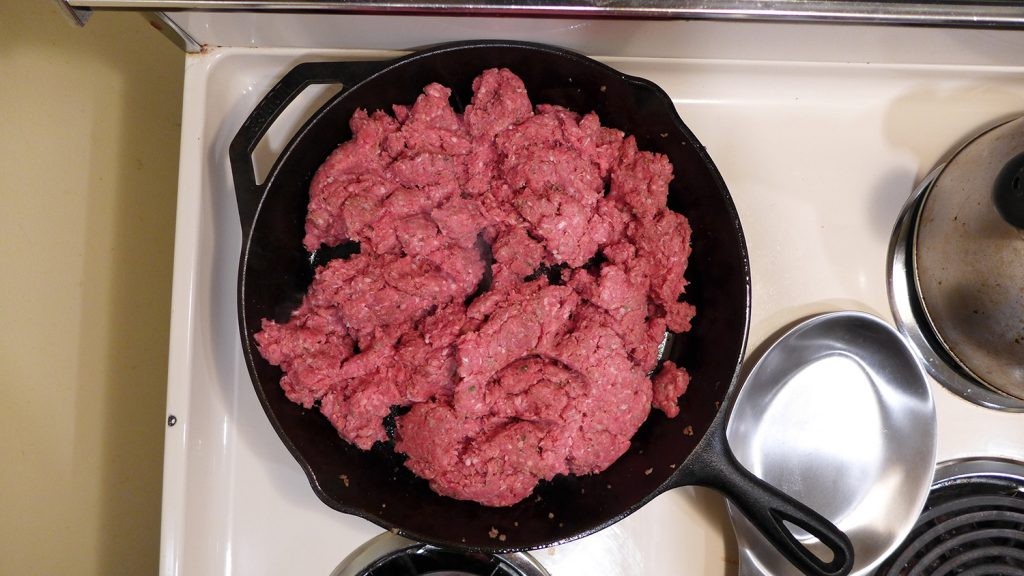 Cook beef in a pan over medium-high heat until lightly browned and fully cooked, breaking up any large clumps.
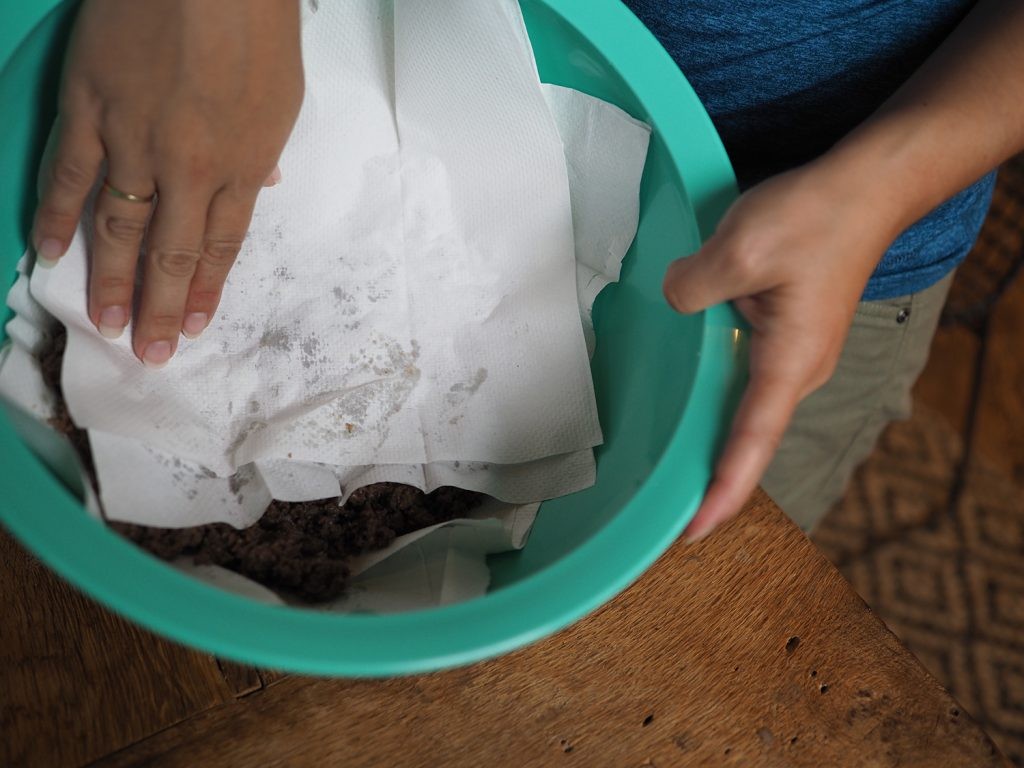 Place meat on a plate with paper towels and blot away any fat and excess moisture.
 Place nonstick sheets or parchment paper on trays to prevent losing small bits of beef. Spread the meat in a thin, even layer.
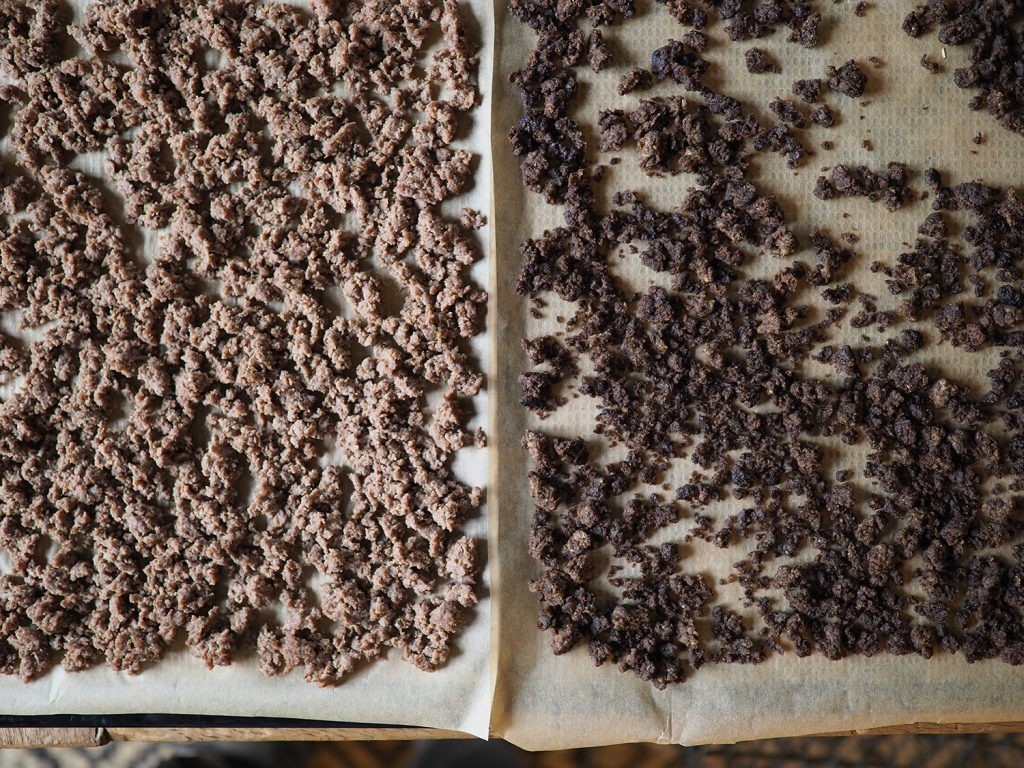 Dry at 145°F for about 6 hours until meat is dark and dry, blotting any fat with paper towels and breaking up clumps a few times during the drying process.
 Break open a few pieces to make sure they are dry all the way through.
Recipe: Chicken
 Home-cooked chicken will not rehydrate—it must be canned or pressure cooked. If you own a pressure cooker you can dry your own chicken, otherwise stick to the canned stuff. White meat is better for drying as it has a lower fat content than dark meat. In addition to adding chicken to meals, you can cold soak (add cold water to the bag) dehydrated chicken for a few hours, drain the excess liquid once it’s rehydrated, and add mayonnaise and relish packets to make chicken salad. A 12.5-oz. can will yield about 3/4 cup of dry chicken.
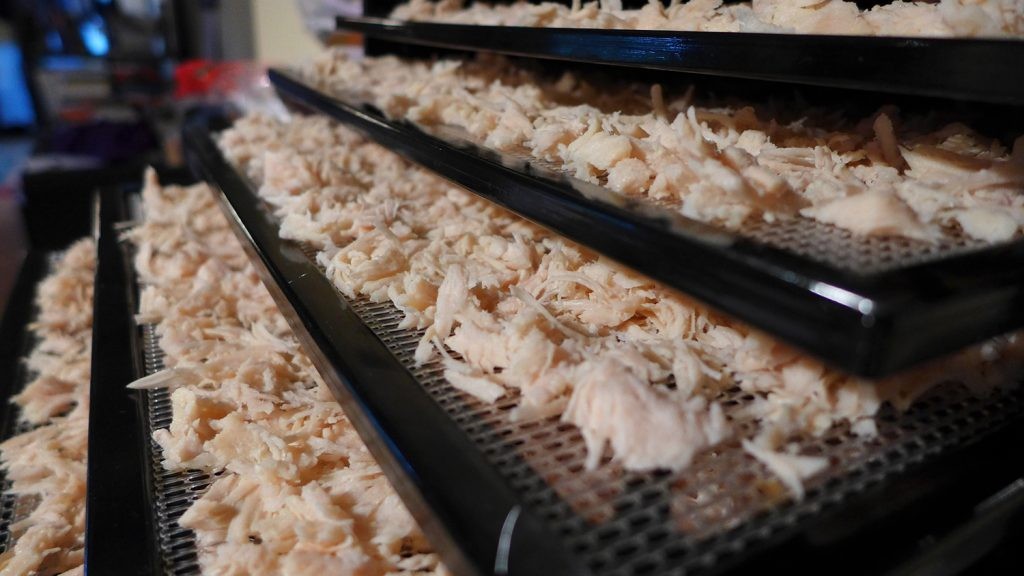
- Spread canned chicken evenly onto trays lined with nonstick sheets or parchment paper, breaking up any clumps. Blot away any fat.
- Dry at 145°F for about 8 hours until dry and brittle.
Recipe: Shrimp
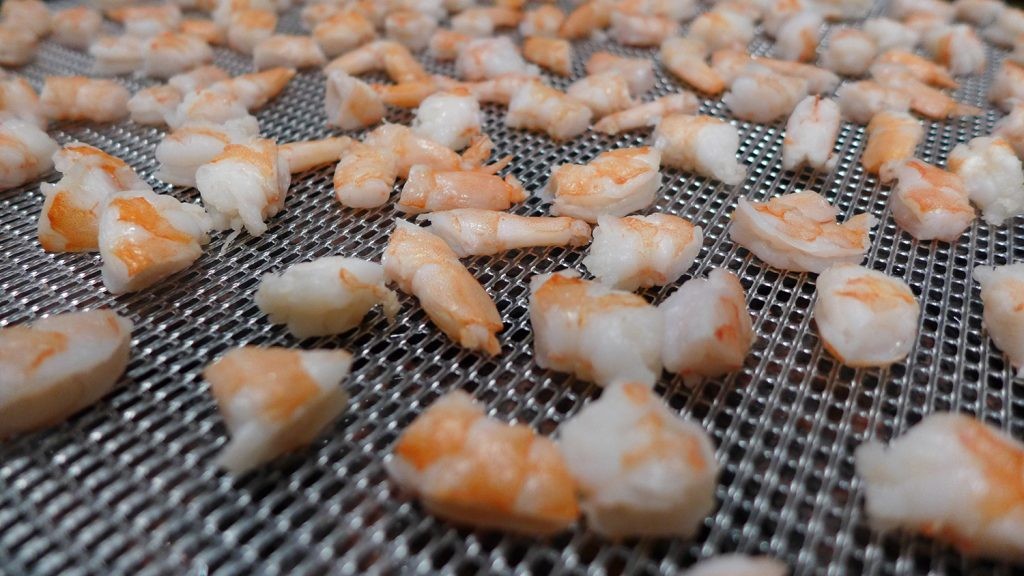 Choose medium-sized shrimp—small shrimp dry too small and larger shrimp can take a long time to dry. Precooked, frozen shrimp should be thawed before drying. One lb. of shrimp yields 2 cups of dry shrimp.
Shrimp takes a longer time to rehydrate than most food, so let it presoak for a little while longer before cooking.
- Slice cooked shrimp into penny-sized pieces (about 4–5 for medium-sized shrimp).
- Spread evenly onto trays and dry at 145°F for about 6 hours.
- Slice open a couple of pieces to make sure they’re completely dry inside.
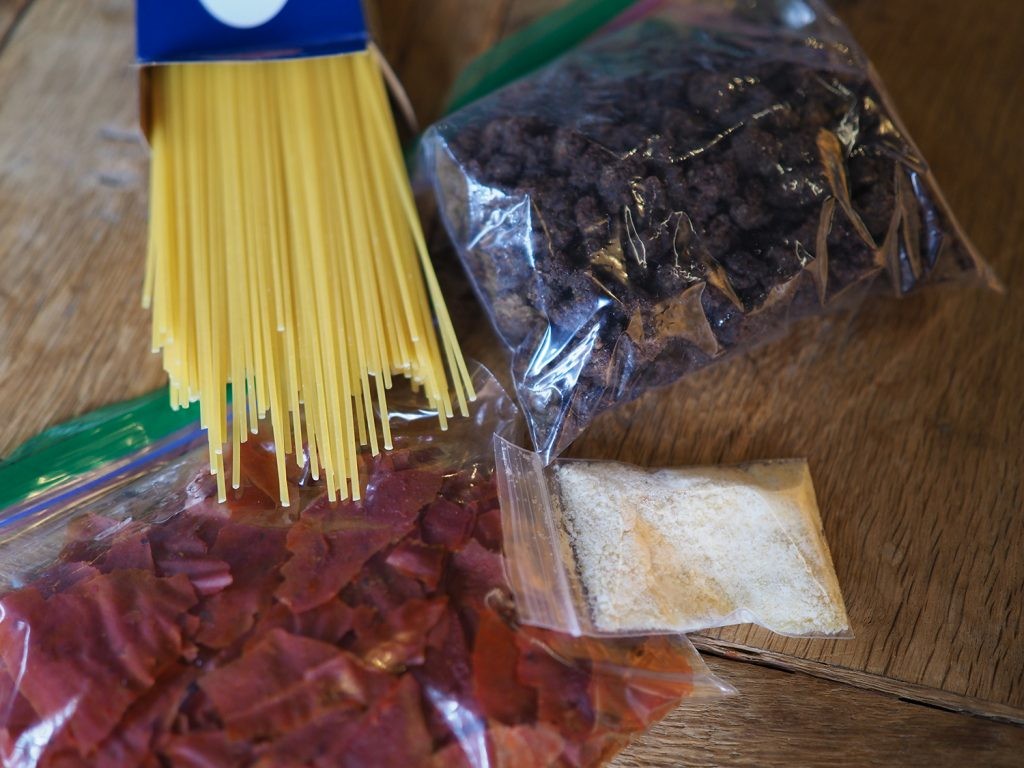
How to Dehydrate Grains, Pasta and Legumes
Rice, quinoa, pasta and beans can all be dried ahead of time, and then incorporated into tasty meals like chicken and veggie quinoa, bean soup, and spaghetti with meat sauce. Drying makes these ingredients more ‘instant’, saving valuable fuel. Dried pasta also has the added benefit of not needing to be drained once cooked on trail, as you can add sauce and/or extra dried ingredients that use the extra water.
Cooking Tips: Grains, Pasta and Legumes
- Cook rice and quinoa as you usually would (subbing broth for water adds flavor, but be sure to use low or nonfat broth to prevent spoiling). Dry rice at 125°F for about 5 hours (or until hard) and quinoa at 135°F for 8–10 hours. Break up clumps as needed. Two cups of cooked rice yields about 1–1 1/2 cups dry.
- Cook pasta al dente and drain. For shorter noodles, spread evenly on trays. For spaghetti noodles, curl a serving portion into a spiral, nest-like shape. Dry at 135°F for 2–4 hours until hard.
- Canned beans rehydrate much better than home-cooked, unless you make them in a pressure cooker. To dry, drain (and rinse if canning liquid is very heavy) prepared beans and spread them in an even layer on trays. Dry at 125°F for 6–8 hours. A 15 oz. can of beans rehydrates to about 1 cup of dry beans.
You can also marinate noodles in soy sauce and other seasonings after cooking, and then dehydrate them for a delicious Asian noodle salad with veggies and shrimp. This can be cold-soaked for lunch—simply add a bit of cold water in the morning, store the bag in a leakproof spot, and by lunch your food will be ready to eat.
How to Dehydrate Meals and Sauces
 Some meals can be prepared to completion before being dehydrated for an even easier trail dinner. Dishes like stews, chili and risotto all lend themselves well to drying.
Dehydrated Meal-Prep Tips:
- Spread everything out thinly and evenly, stirring on the trays every so often to ensure thorough drying.
- Most meals can be dried at 135°F for 8–10 hours. Just make sure there’s no remaining moisture and break up clumps of food as it dries.
- If the meal normally includes cheese, like risotto, take some in a separate bag and add it on the trail.
The same goes for sauces. Jarred or homemade tomato sauce can be spread onto nonstick sheets or parchment paper and made into tomato leather that will reconstitute with the addition of hot water.
Recipe: Tomato Sauce

- Choose a sauce that doesn’t have large chunks, or run it through a blender. Avoid cheesy or creamy sauces. Spread in a thin, even layer on nonstick sheets or parchment paper.
 2.Dry at 135°F for 6–8 hours, flipping at about 5 hours when you can easily peel the leather off. (This is optional to make the drying process go faster, but the sauce will dry without flipping.)
 3.The leather should be pliable and not sticky. Tear into small pieces for easier reconstituting on trail.
How to Assemble Dehydrated Meals
Now comes the fun part—putting together your meals! Get creative and try different flavor combinations.
 Round out your dehydrated ingredients with store-bought items like powdered milk and sauces, bullion, instant mashed potatoes, spices and cheese. You can even carry oil in a squeeze bottle to add flavor and calories (a common thru-hiker trick).
- Freezer bags and vacuum-sealed bags are perfect for holding single-serving meals. Label the outside with the type of meal and the amount of water needed to rehydrate (most meals require equal parts water to food). If the food is sharp, place a paper towel in the bag first to prevent punctures.
- If there are ingredients with a higher moisture content, like fruit, place those in their own bag inside the main meal bag to keep the moisture away from the other ingredients.
- A normal dinner serving is about 1 cup of dehydrated food. Increase to 1 1/2 cups for large portions.
- Don’t limit yourself to dinner. Rehydrated fruit, combined with bread crumbs, can be turned into dessert. Quinoa with fruit and cinnamon is great for breakfast.
 How to Rehydrate Dried Food
 Dehydrated meals generally require equal parts water to food and about 15–25 minutes to reconstitute. If you have one, a pot cozy (an insulated sleeve for your pot) helps retain heat while your food soaks.
 Follow these steps to cook your meal on the trail:
- Put food in pot and add an equal amount of water. Let soak for 5 minutes.
- Bring water to a boil. Turn heat down slightly and simmer for 2–10 minutes.
- Turn off heat and cover pot. Let sit for 10 minutes, or until food is tender and fully rehydrated.
- Add extras, like cheese, and enjoy!
Alternately, you can simply add boiling water to a freezer bag, place the bag in an insulated sleeve and let it sit for 20–30 minutes, massaging the bag periodically to ensure the meal is rehydrating evenly. This may not fully rehydrate your food (i.e., you might have a crunchy bite or two), but it is much more hands-off and creates zero dishes to clean.
Pro tip: take a small salt and pepper shaker designed for travel with you to adjust seasonings on the trail.
Two Recipes for Single-Serving Dehydrated Meals
Recipe: Spaghetti and Meat Sauce
 Ingredients:
- Freezer bag 1:
- 1 portion of dried pasta
- 1/4 cup dried ground beef (replace with veggies for a vegetarian option)
- Freezer bag 2
- 1/4 cup packed tomato leather
- 1/4 tsp. garlic powder
- Parmesan cheese on the side
Directions:
- Put noodles and beef into pot and just cover with water. Let soak for 5 minutes.
- Bring water to a boil and add tomato leather. Simmer and stir until tomato sauce is reconstituted.
- Turn off heat, cover and let sit for an additional 5–10 minutes until beef is tender. Add cheese and enjoy.
Recipe: Shepherd’s Pie
Ingredients:
- Freezer bag 1:
- 1/3 cup dried ground beef
- 1/3 cup dried mixed veggies (corn, carrots and peas)
- 1/2 package gravy mix
- Freezer bag 2:
- 1/2 cup instant mashed potatoes
- 1/4 tsp. garlic powder
- 2 Tbsp. dried milk
- Salt and pepper to taste
- Cheddar cheese on the side
Directions:
- Heat 3/4 cup water in pot until almost boiling. Pour into bag with instant potatoes and knead bag to mix. Set aside.
- Put meat, veggies and gravy into pot and add about 3/4 cup water. Let soak for 5 minutes.
- Bring water to a boil and cook for 5 minutes. Turn off heat, cover and let sit for 5–10 more minutes, until meat and veggies are tender.
Layer potatoes on top of meat and veggies, adding cheddar cheese on top.

Leave a Reply